How to export your email from Outlook

On the main tabs, select File.
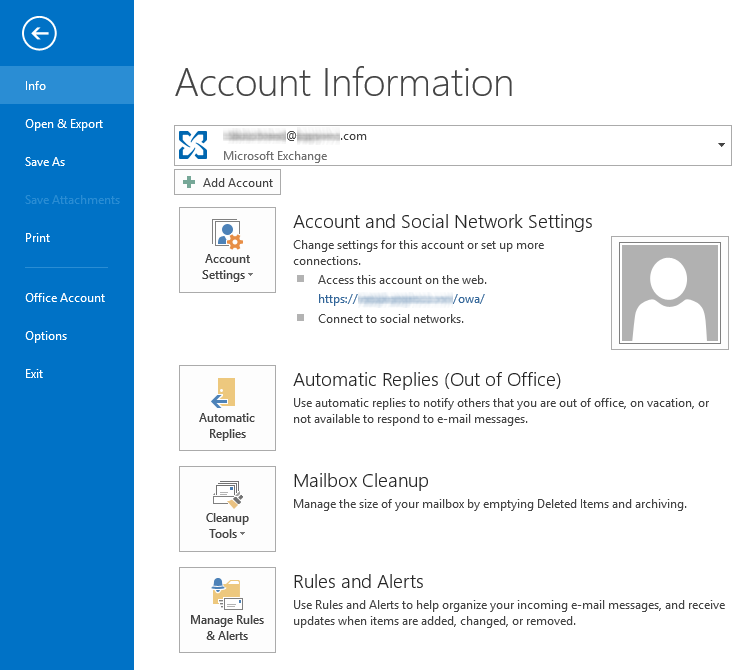
On the Account Information page, select Open & Export.
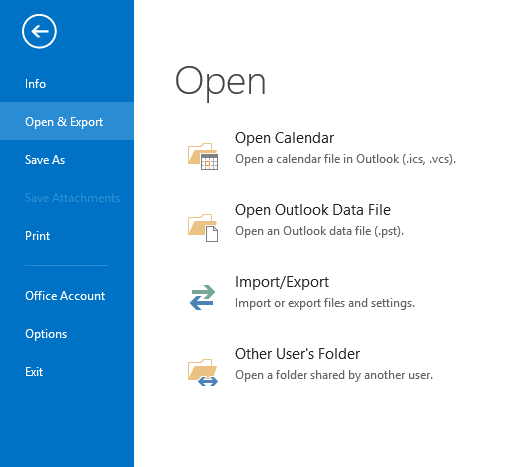
On the Open page, select Import/Export.
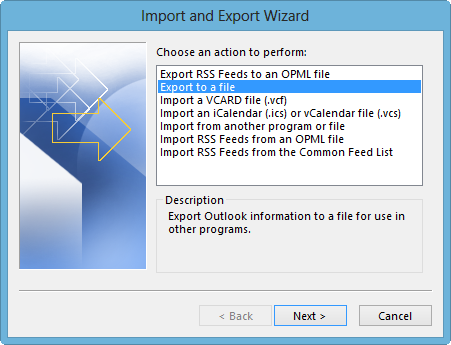
In the Import and Export Wizard window, select Export to a file and click Next.
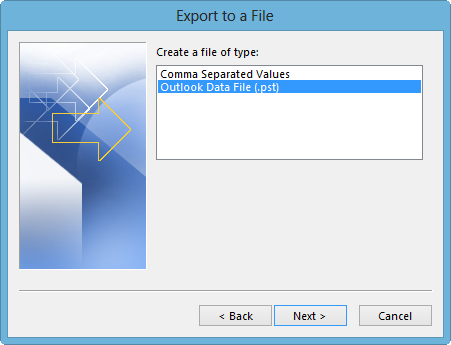
In the Export to a File window, select Outlook Data File (.pst) and click Next.

In the Export Outlook Data file window, select the folder from which the data will be exported (Note that selecting the top level account folder will save all e-mail messages, contacts, calendar information, etc. to the .pst file.)
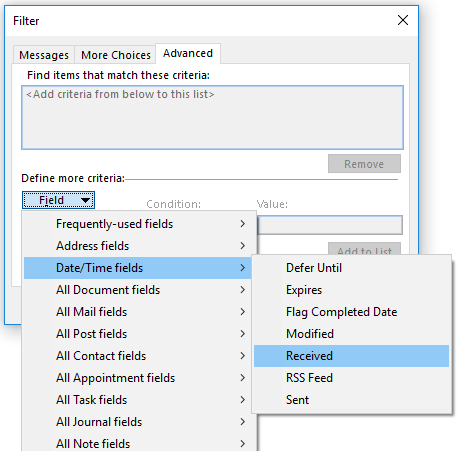
Select the Filter… button, select Advanced, select Field, select Date/Time fields, select Received.

Select the Condition: drop-down, select Between, enter your date range in the Value field, select Ok. When prompted, select Yes to add the date criteria.
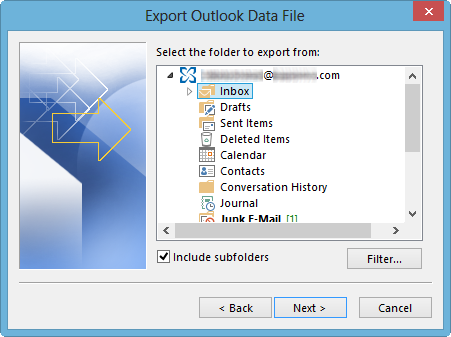
Click Next (Note that selecting the top level account folder will save all e-mail messages, contacts, calendar information, etc. to the .pst file.)
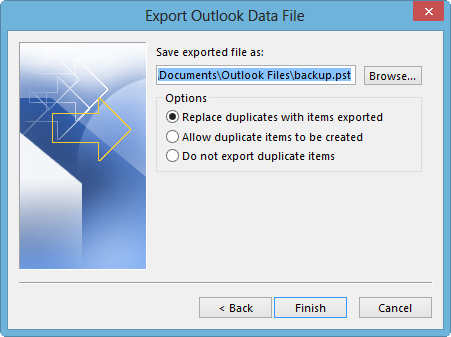
Confirm file name and save location (or Browse… to a new location), select desired Options, and click Finish. (Note that suggested option is to Replace duplicates with items exported to avoid potential duplication in the saved .pst file.)
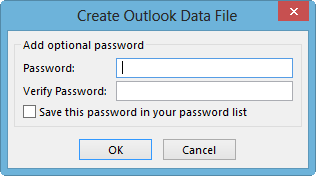
Upon initial creation of .pst file, Outlook will prompt for an optional password. Click OK without setting a password, as the additional layer of security may cause issues when importing the .pst into a client or Exchange server.
Outlook will export the .pst to the location set previously. When complete, the file will be available in the specified location. (Note that larger .pst files can take several minutes to process.)
