Setting up Outlook Manually.
IMPORTANT: Finish the steps on the Start Here page before proceeding.
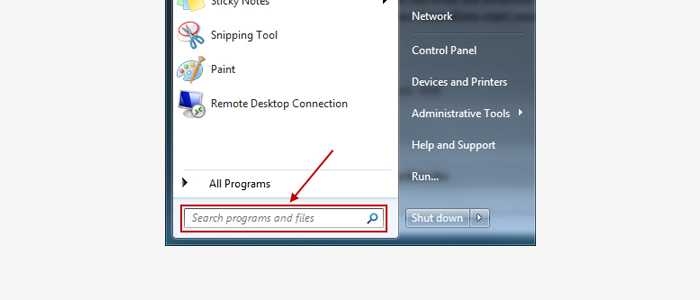
Click the Windows Start Button and search for Control Panel, or click on Control Panel in the Start Menu.

At your computer’s Control Panel, make sure your view is set to “Large” or “Small Icons”.
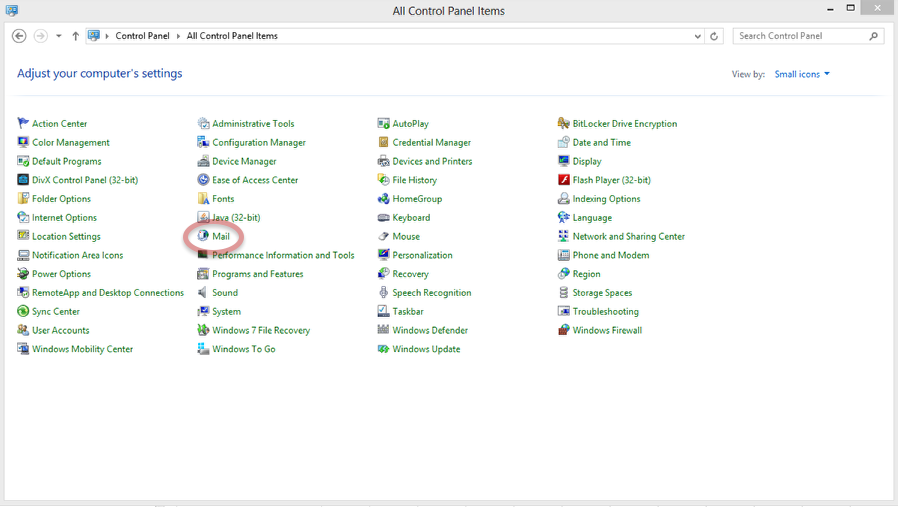
Launch the “Mail” Application from your system’s control panel.
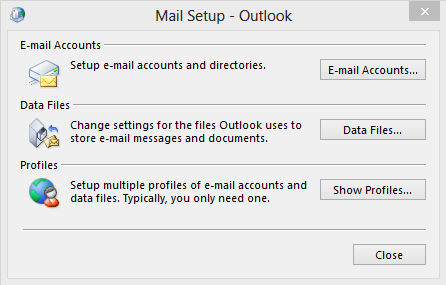
Click the“Show Profiles” button.
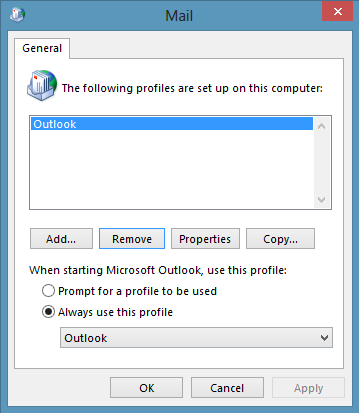
Select “Add” to create a new Outlook profile.
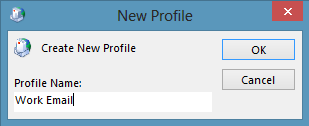
Name your profile, example: “Work Email” and select “OK”
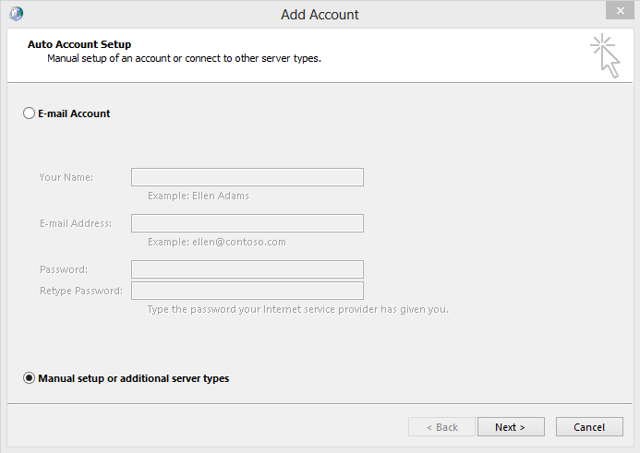
Select the radio button for “Manual setup or additional server types” and click “Next”
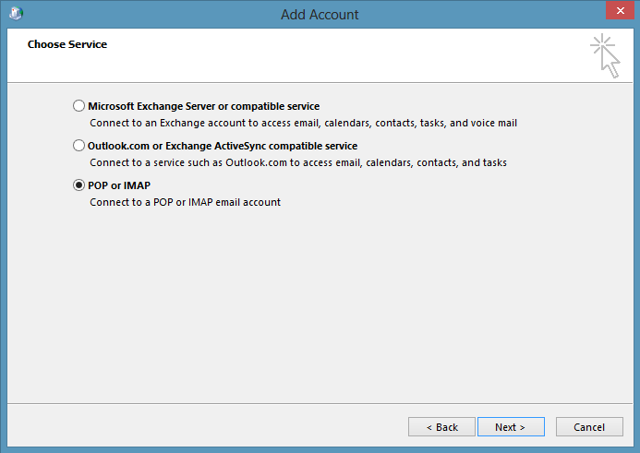
Select “POP or IMAP” and click “Next” (For Outlook 2010, select the “Internet E-Mail” option and click “Next”)

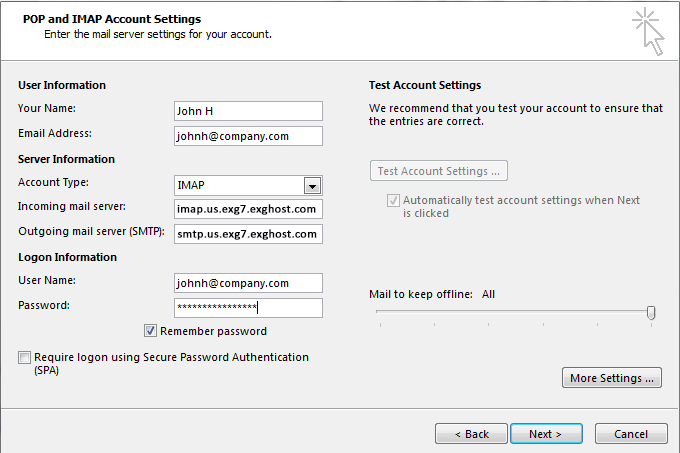
- Your Name: Enter your name
- Email Address: Enter your email address
- Account Type: Choose IMAP
- Incoming mail server: imap.us.exg7.exghost.com
- Outgoing mail server: smtp.us.exg7.exghost.com
- User Name: Enter your email address
- Password: Enter your email password
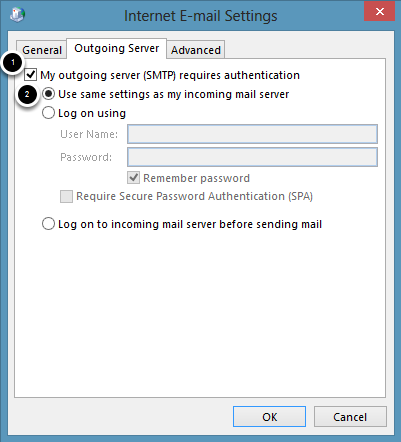
Click on Outgoing Server tab.
- Check My outgoing server (SMTP) requires authentication
- Select Use same settings as my incoming mail server
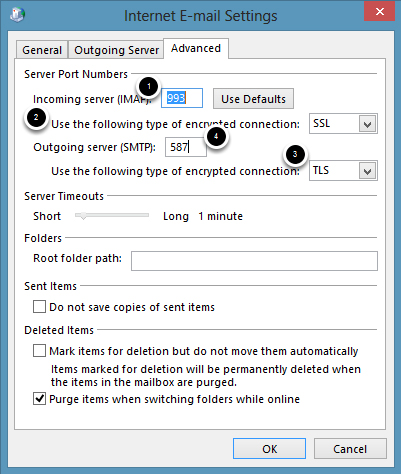
Click on the Advanced tab.
- Enter port number 993 in the Incoming server (IMAP) field
- Select SSL on Use the following type of Encrypted connection (under Incoming server)
- Select TLS on Use the following type of Encrypted connection (under Outgoing server) NOTE: On Outlook 2013, use SSL if you receive an encryption error.
- Enter port number 587 in the Outgoing server (SMTP) field
Click on OK when finished.
Click Next.

If your settings are correct you will see green checks. If any of the steps fail go back and double check the server settings and password.
NOTE: On Outlook 2013, use SSL instead of TLS on the Advanced tab (under Outgoing server), if you receive an encryption error.
Click Close when finished.
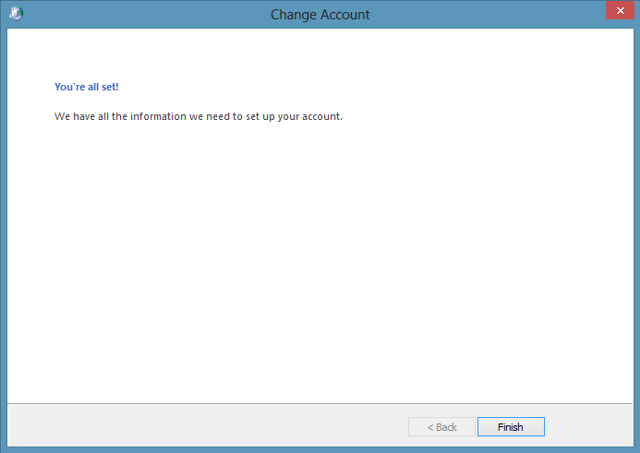
Click Finish.
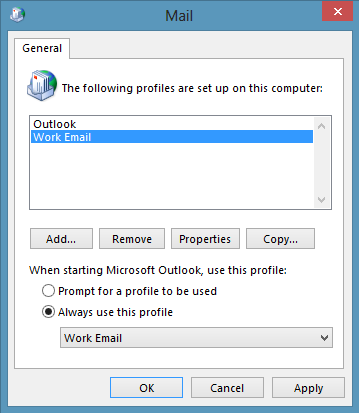
If you would like Outlook to open the new profile by default whenever Outlook is opened, check the button for Always use this profile and select your new profile from the list and click OK.
If you would like to toggle between the profiles and be prompted every time Outlook is opened for a profile selection, click Prompt for a profile to be used and Outlook will ask which profile you would like to use when opened.
Click Apply and OK when finished.
Congratulations! You have successfully setup Outlook.